
The first of all it’s really simple create a curves adjustment layer. Click on the circle adjustment layer icon and choose curves. Then there you get three eyedropper tools, right select the middle one. Not one with the white drop not one of the black one. In this article you will know about color correction.
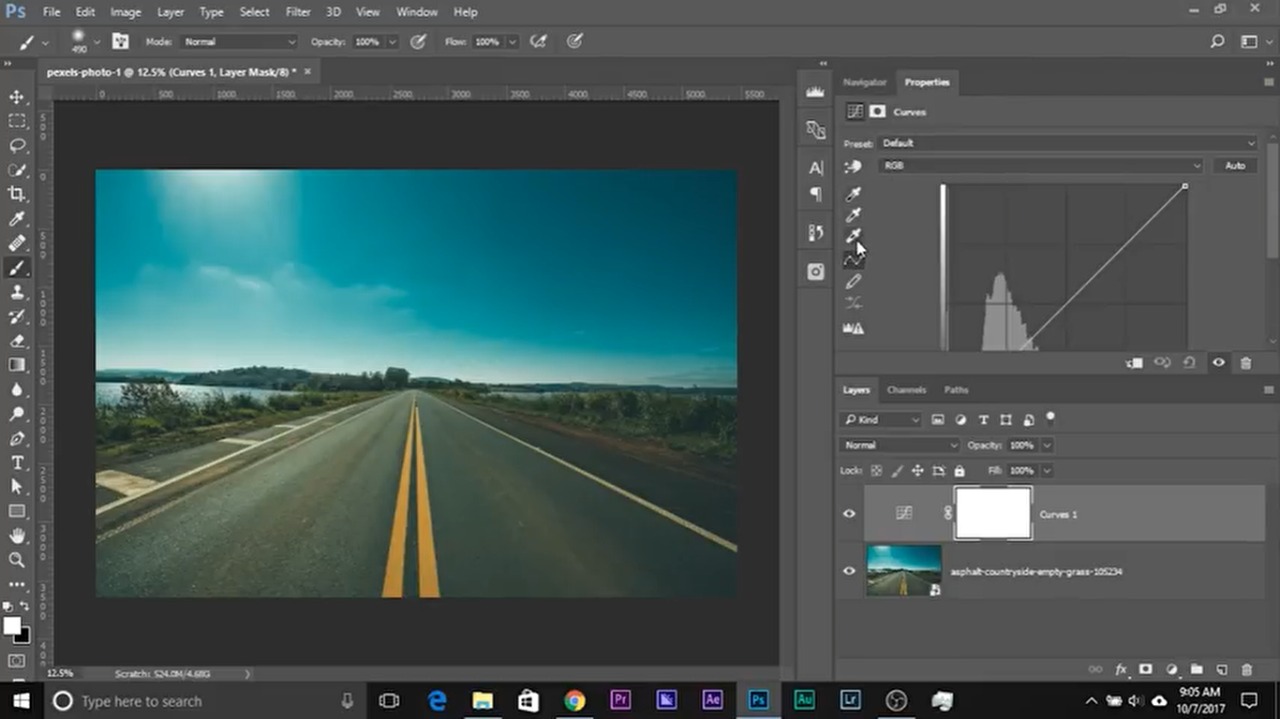
Select the green one and click on anything which should have been great in real life. Why clicking the photo click on anything which should have been great. So as you can see, we have a grey road. So obviously we’ll click click here. We’ll try taking here and there and boom it’s just it solves the problem try clicking on different areas. And yeah, it solves the problem have a look before after it takes away all those greens and really Gallagher.
Photo Color Correction
It’s yours. Now you can go ahead and select the white level in the Black Level just like this and you can play with that. But here’s the problem. What if you have an image which does not have an area which should have been great in real life or what if you have a complex image where you cannot find out that particular area. Here’s what you need to do. You need to find out the area which is closest to gray you need to use Photoshop algorithms mats and tricks.
To find out an area which is closest to Gray and click on that. And by the way if you wondering how does clicking on Grey color, correct? My images automatically here’s what Photoshop sees it like, so if you say Photoshop, okay, this should be gray it this area should be grave and when you click on that area for a shop looks at that area and Photoshop sees that it’s not perfectly great.
As a green tint to it. So what Photoshop will do it will pull down. The greens are at the opposite color, which is magenta to neutralize that gray and that as a result the neutralize the whole image. That’s how that works. Now. If you cannot find a gray area in your photo, you need to find out an area which is closest agree. And here’s how to do it. It’s really simple create a solid color adjustment layer and just click on the adjustment layer icon and click. Eight a solid color adjustment layer create a new layer and fill it with 50% gray text core of 50% gray is eight 08080 or r g and B all of them at 128.
Photo Color Correction Service
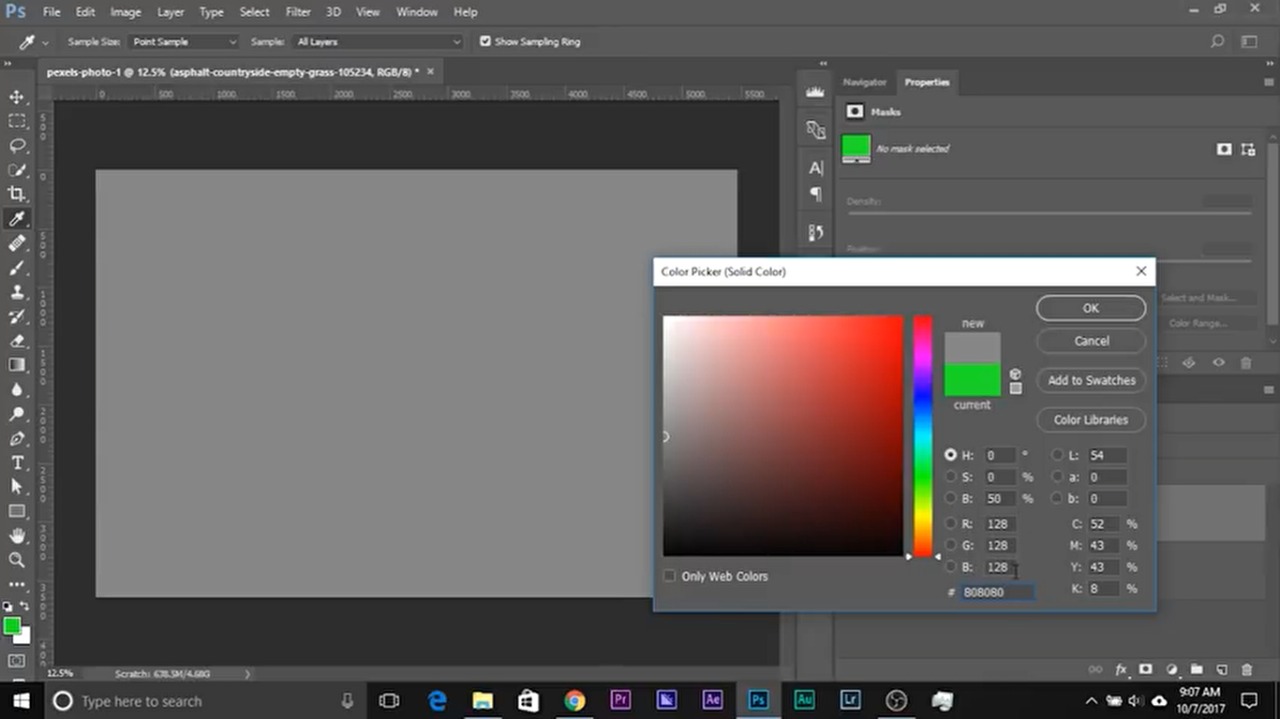
And also create a new layer and just fill it with 50% way. There’s another way to do it. Let me just show you another way. So control-shift-n command shift n if you’re using a Mac, it opens up the new layer dialog box. You can choose mode to Overlay and fill with overlay neutral color 50% gray click OK and then change the blend mode to normal or another way to do it is just close it create a new layer and press shift backspace. Okay shift delete dephasing man.
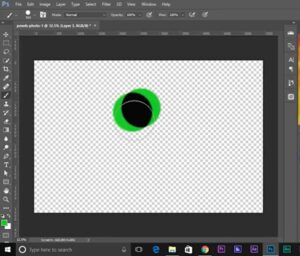
Shift backspace and then choose 50% gray and fill it up. So three ways of doing the exact same thing. Now what you need to do change the blend mode to difference. Now. How does that help? Let me show you how does that help now? If you want to know more about the blend mode difference in and outs of blend mode difference and how to use that in day-to-day life. Check out the video right here, but here’s what’s important if I create a new layer and say painted with green. Okay painted with Green create another layer also painted with green just like that. So we have two layers and change the blend mode of this one to difference. Look this turns black.
Why
Because this resulting color is the difference of this color and this color and the difference of green and green is what black has the glass that now if you look at this, so if you look at green, so what is the RGB of green 0 255 0 and if you subtract Green from it, which is 0 255 0 the answer would be 0 – 0 255 –
55 + 0 – 0 so the result would be 0 0 0 which is so cancel that and delete that delete both of that and turn on this so this is different so that area which is the darkest.

All right. Listen to this carefully the area which is the darkest is closest to Gray.Isn’t that interesting? How is it closest degree any area which is completely black will be exactly 50% gray as the difference between both of them will yield black? So any area which is dark relatively is closer the grave because this layer is great right any area here which is dark is closed the gray. Again, why because the difference between the same color is what black now we know that this area is a little darker this EVS a little darker and you can use different tricks to find out the darkest areas. You can choose threshold. You can just go ahead and choose threshold and just figure out the darkest area. So this is the darkest area just

Finally
Okay, there we go. We know this is the darkest area and create a new layer and maybe take a brush and just indicate it if the green or anything, you can also Mark it using the eyedropper using this tool color sampler tool can also Mark it pointed just like that, but I’m going to choose the brush and just Mark the series out. Okay that work for me. You can choose any method you want but the concept 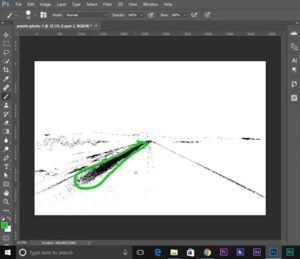
should be clear with you the difference between the same color is one Black So now you can go ahead and delete the threshold. You don’t need it. You can also go ahead and delete the gray layer. Now what you need to do create a curves adjustment layer. Okay, and choose the middle eyedropper tool and try clicking on these areas and just different areas inside of that marked area until you get the results you’re looking for.
And there you go. If your image doesn’t have that gray area use that technique find the areas which are closer to gray. How by using the concept of different create the gray layer.Geez, the blend mode to difference and the darker areas will be the closest degree because the difference between the same colors as what black I hope this video helped you.
More services
If you want to edit photos and you have no time to do that then infotecsourz here to provide you the best photo editing services. You will get the best service from us. So, why late? Get a quote without any hesitation.
You can take a look at our services listed below:
Product photo editing services