Clipping path is a closed Vector path or shape used to cut out image. So anything inside the path will be included after the clipping path in photoshop is applied and anything outside of this path that we create will be left out or clip. So let’s take a look at how that works come in Photoshop right now, and I’m going to grab my pen tool by hitting pee on my keyboard. I’m also going to make sure that my paths panel is available so that I can preview my path as I’m drawing it. 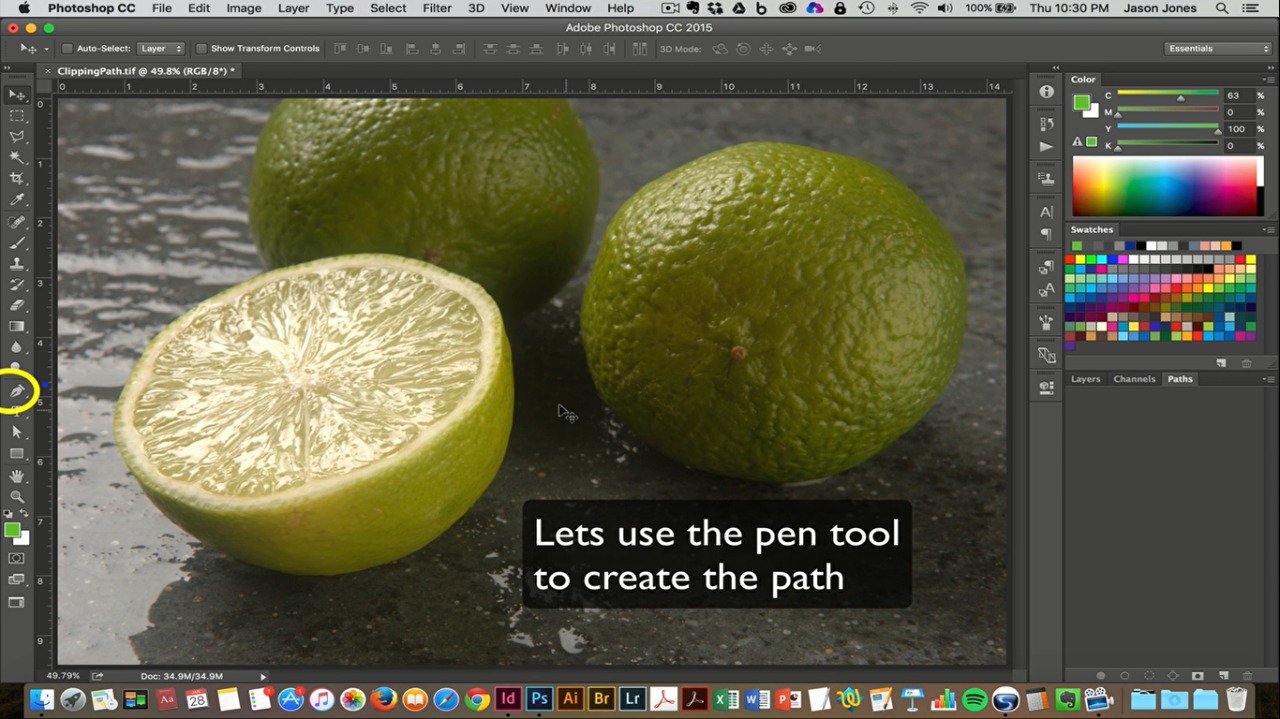
And what I’m going to do is I’m going to create a path around this line in the foreground and then I’m going to click that path so that I’m not able to see the rest of the background or the other lines once I import it into illustrator or InDesign. So let’s start by drawing the path and I like that when I’m drawing this path. I can look at my past panel and even see in real time this path being created.
Clipping path in photoshop
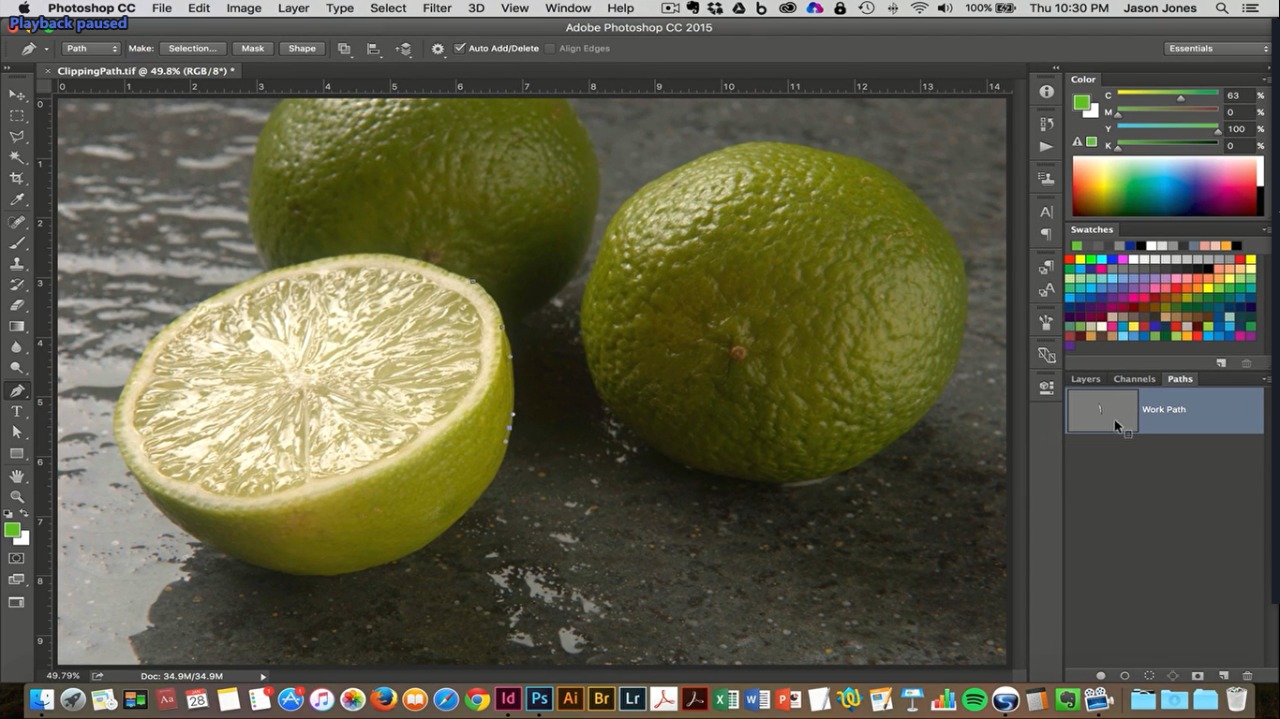
I’m going to continue drawing my path with the pen tool here and I’m moving kind of quickly. The nice thing about the pencil is that I can always grab the direct select tool after I’ve connected. The dots from where I started to where I’m ending and I can grab the direct select tool and I can adjust these points. And just make them fit a little tighter around the castle just do that right now grab the direct select tool. From the tool panel and I’ll zoom in a little bit you can see I’m just going to come go in here and adjust some of these points.
Just kind of move it around my document here and adjusting some of these days EA curves. So now we have this path that we’ve created. It’s still not a clipping path. Meaning that if I were to bring this into In Design, I’d still see all of this background and if we were to look in my past panel, you can see we have our working path.
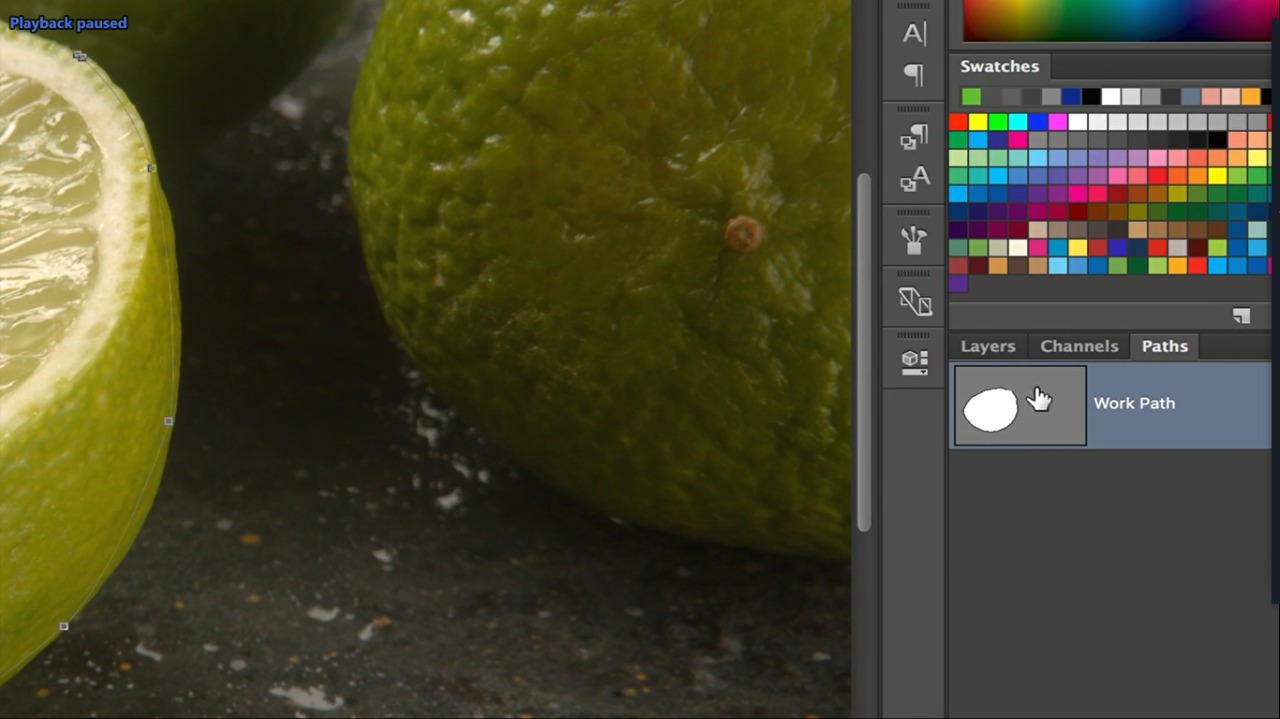
But the next step after creating the work path to save the path. So I’m going to go to the menu fly out in the past kennel and I’m going to click on Save path. I say this is the next step because the third step will be to clip the path. But as you can see clipping path is great out here. You can’t do that yet. So first we have to make the path.
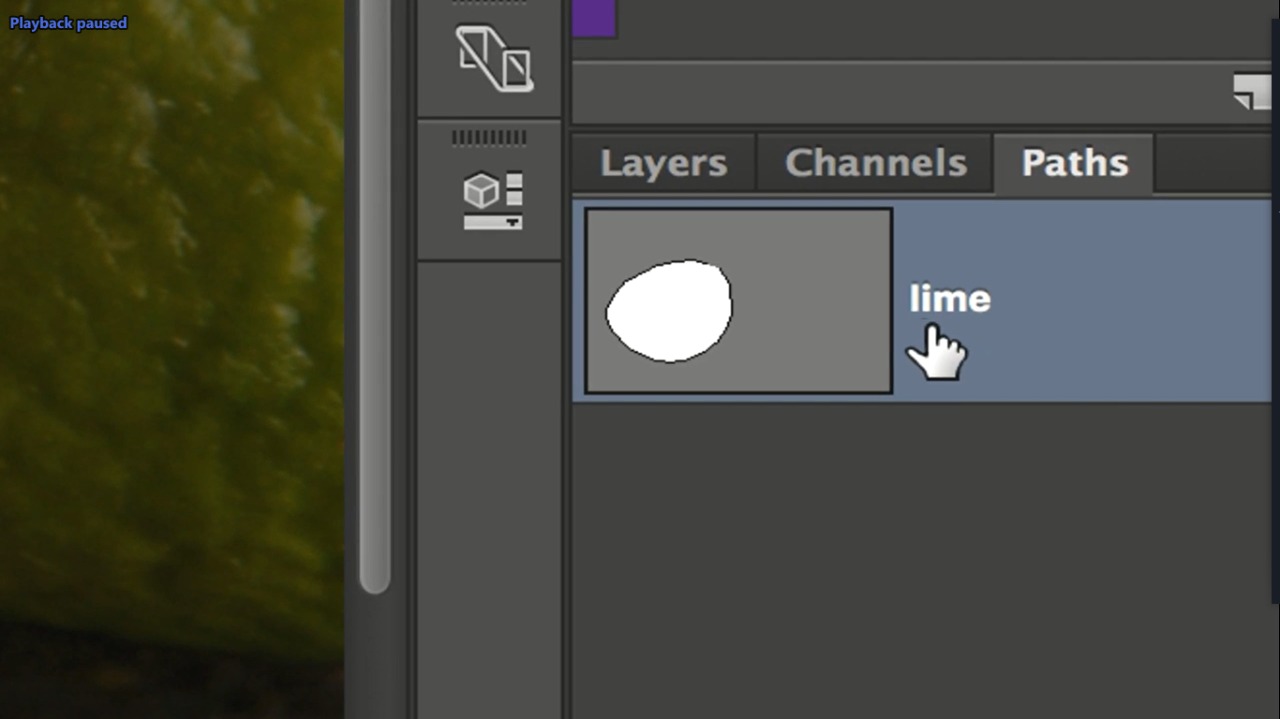
And then we’ll click the path. Now when we select save give it a nice fancy name. I’m going to call my lime and I’m going to confirm that so now we have saved this path.
Tips
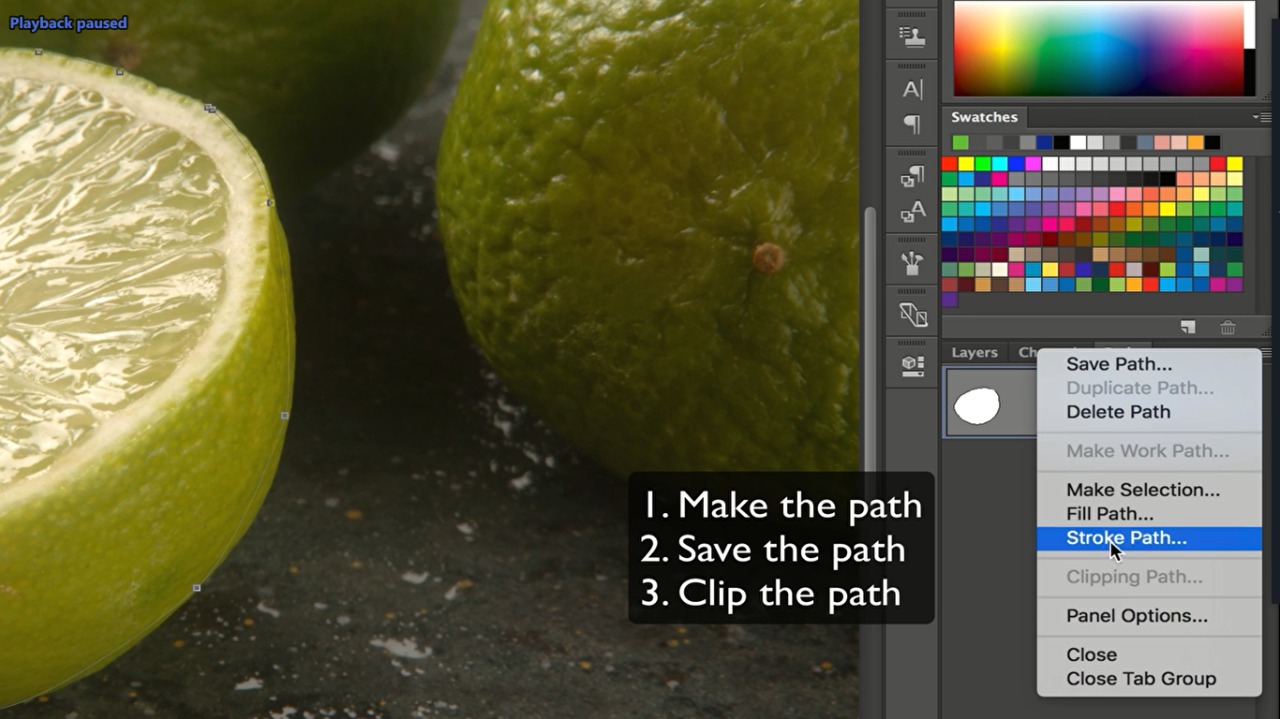
I’m going to go back to the menu fly out and now look clipping path is available. So it says clipping path dot dot dot or ellipses, which means there’s more to come.
And there is so I’m going to click on clipping path and I’m going to highlight the path that we created because we only created one and I’m going to leave flatness at zero. I’m going to let the printer handle the PostScript on that meaning that if we were to have problems printing then we could go in here and maybe enter a value from .22 100 to see if that solves the problem. But in most cases you’re not going to have a problem with that these days so I’m just going to leave it blank and I’m going to Okay, and check this out. If you look in the past panel now, look how different the text looks.

So it has this outline around the text. Now, this is what lets us know that this is now a clipping path. Okay, so we created a work path with the pen tool. We went to the path panel and we save the path and after we save the path, we applied clipping to that path.
If we look at the document area, we don’t really see that anything is different visually. Okay, we only see that in the past cattle. So everything looks the same but when we import this into InDesign, which will do now by going to the file menu. Save as And I’m going to save it into this folder here as a tip, although clipping paths. These days can be applied to jpegs and psd’s but we’ll just do tip for now Click save
I’m going to bypass
I’m going to bypass the default option since these don’t really affect how the clipping path in photoshop will be viewed in InDesign. You need to confirm that while that saving. So, you have to slide over to InDesign and while in InDesign I’m going to place it. So I’m going to go to the file menu and I’m going to select place or command d. And I’m going to select my file and open it and you can even see here when I’m trying to place this file. You can see that the background the other two lines are still in the preview while my cursor is loaded.Even though we’ve applied clipping pads on it.
But as I place this file. You can see that the background is actually knocked out by that clipping path in photoshop. So we applied that path to this line and we clicked it which essentially created the transparency. So if I were to move this over text or over this color background here, you can see that the background is being hidden and I say it in and not erase because if I were to grab my direct select tool and hover over this path, you can see that the background actually is still there. It’s just being Clip By that clipping path in photoshop
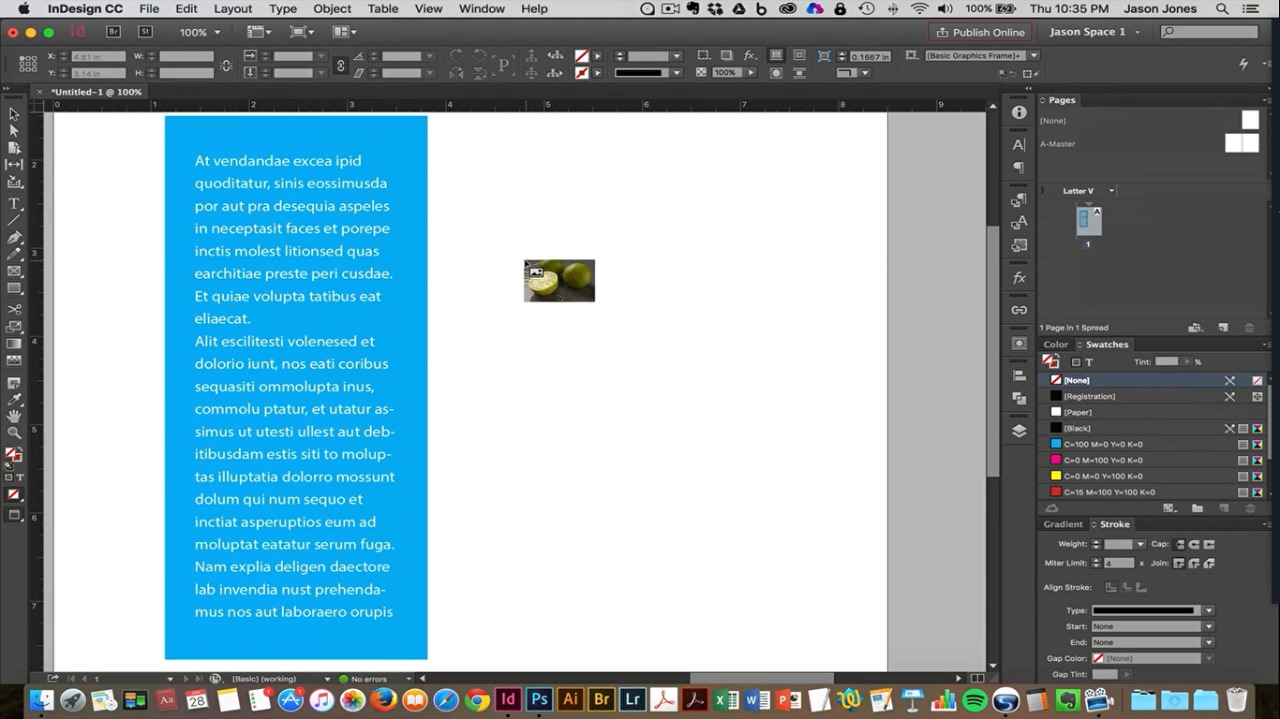 That we created and that my friends is how do you create a clipping path in Photoshop which will create transparency once you import that file into illustrator or InDesign
If you want to edit photos and you have no time to do that then infotecsourz here to provide you the best photo editing services. You will get the best service from us. So, why late? Get a quote without any hesitation.
You can take a look at our services listed below:
Product photo editing services