I wanted to show you how you can remove a background fast and easy. Once you get your image opened in Gimp. First thing that you’re going to want to do is come over here to the layers Tab and scroll down to where it says add Alpha Channel what you got that done then come to this little button. Here and push duplicate now. We’re now that we’re working on a duplicate. Just come over here to colors. Go to desaturate click Luminosity. Click. Ok. Go back two colors come to brightness and contrast around the contrast all the way up and then adjust the brightness.
How to Remove Background
Until you get something that’s almost completely black and white. That’s what you’re looking for. Click. OK grab the pencil with a hard brush. Check the size. We don’t want to paint with a small brush that take too long. You can flip the black and white back and forth with those little arrows and all we’re going to do is block out. The white or the black whichever the case may be you can scroll in by holding down Ctrl and with the mouse wheel scroll. Zoom in I’m sorry flip these colors now block out black or the black from the white. Okay. Nope here. Do the same thing will zoom in to get the rest of that.
Let’s get the major block first control mouse wheel hold down the mouse wheel to move the screen and then here’s kind of a neat little trick. You hold the shift key and let up on the mouse button be the left Mouse button and then it gives you a straight line from the crosshairs there. So line up the outside of your brush. Wherever you want to start like right there’s where I want to start and I want to end up heading into the elbow just a little bit right there. I’m going to start right there.
Remove Background
That’s okay. I’m going to let off on that shift button for a minute come up here. Click down hold down shift let up on the mouse button.
Lined up where I want to be and then let’s adjust that size way down here little come in and clean up the rest. Just by hand and have to be perfect. Okay now want to do once we get to that stage as come back up to the colors Tab and invert colors now, we want to copy or control C copy that
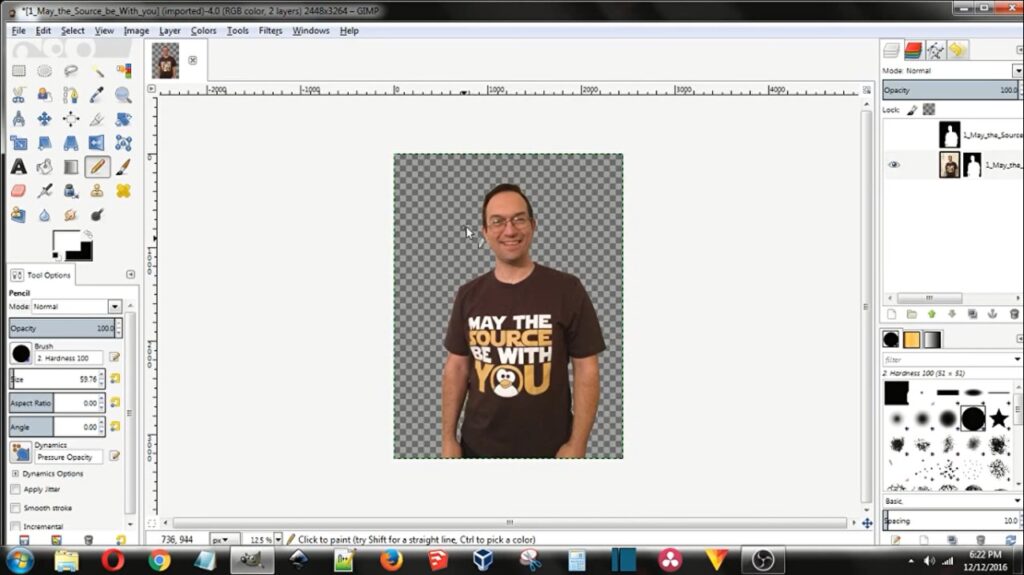
Turn off visibility on that layer. Go to your main layer. And then go up to layer mask. Add Mask full white opacity.
 And then just simply paste or ctrl-v. Now that you have a floating layer push anchor Now you see that the checkered background stands for transparency. You can come up here and right click and push new from visible.

These two you can right click and delete layer right? Click and delete layer. Be sure when you save this the either save it as a gift project here or export it as a PNG instead of a jpg.
Go ahead and push export and I’m not going to do that right now, but go ahead and push export and the P&G will save the transparency. Then you can add a background or put this on a website and let the website be the background.
More Services
If you want to edit photos and you have no time to do that then infotecsourz here to provide you the best photo editing services. You will get the best service from us. So, why late? Get a quote without any hesitation.
You can take a look at our services listed below:
Product photo editing services